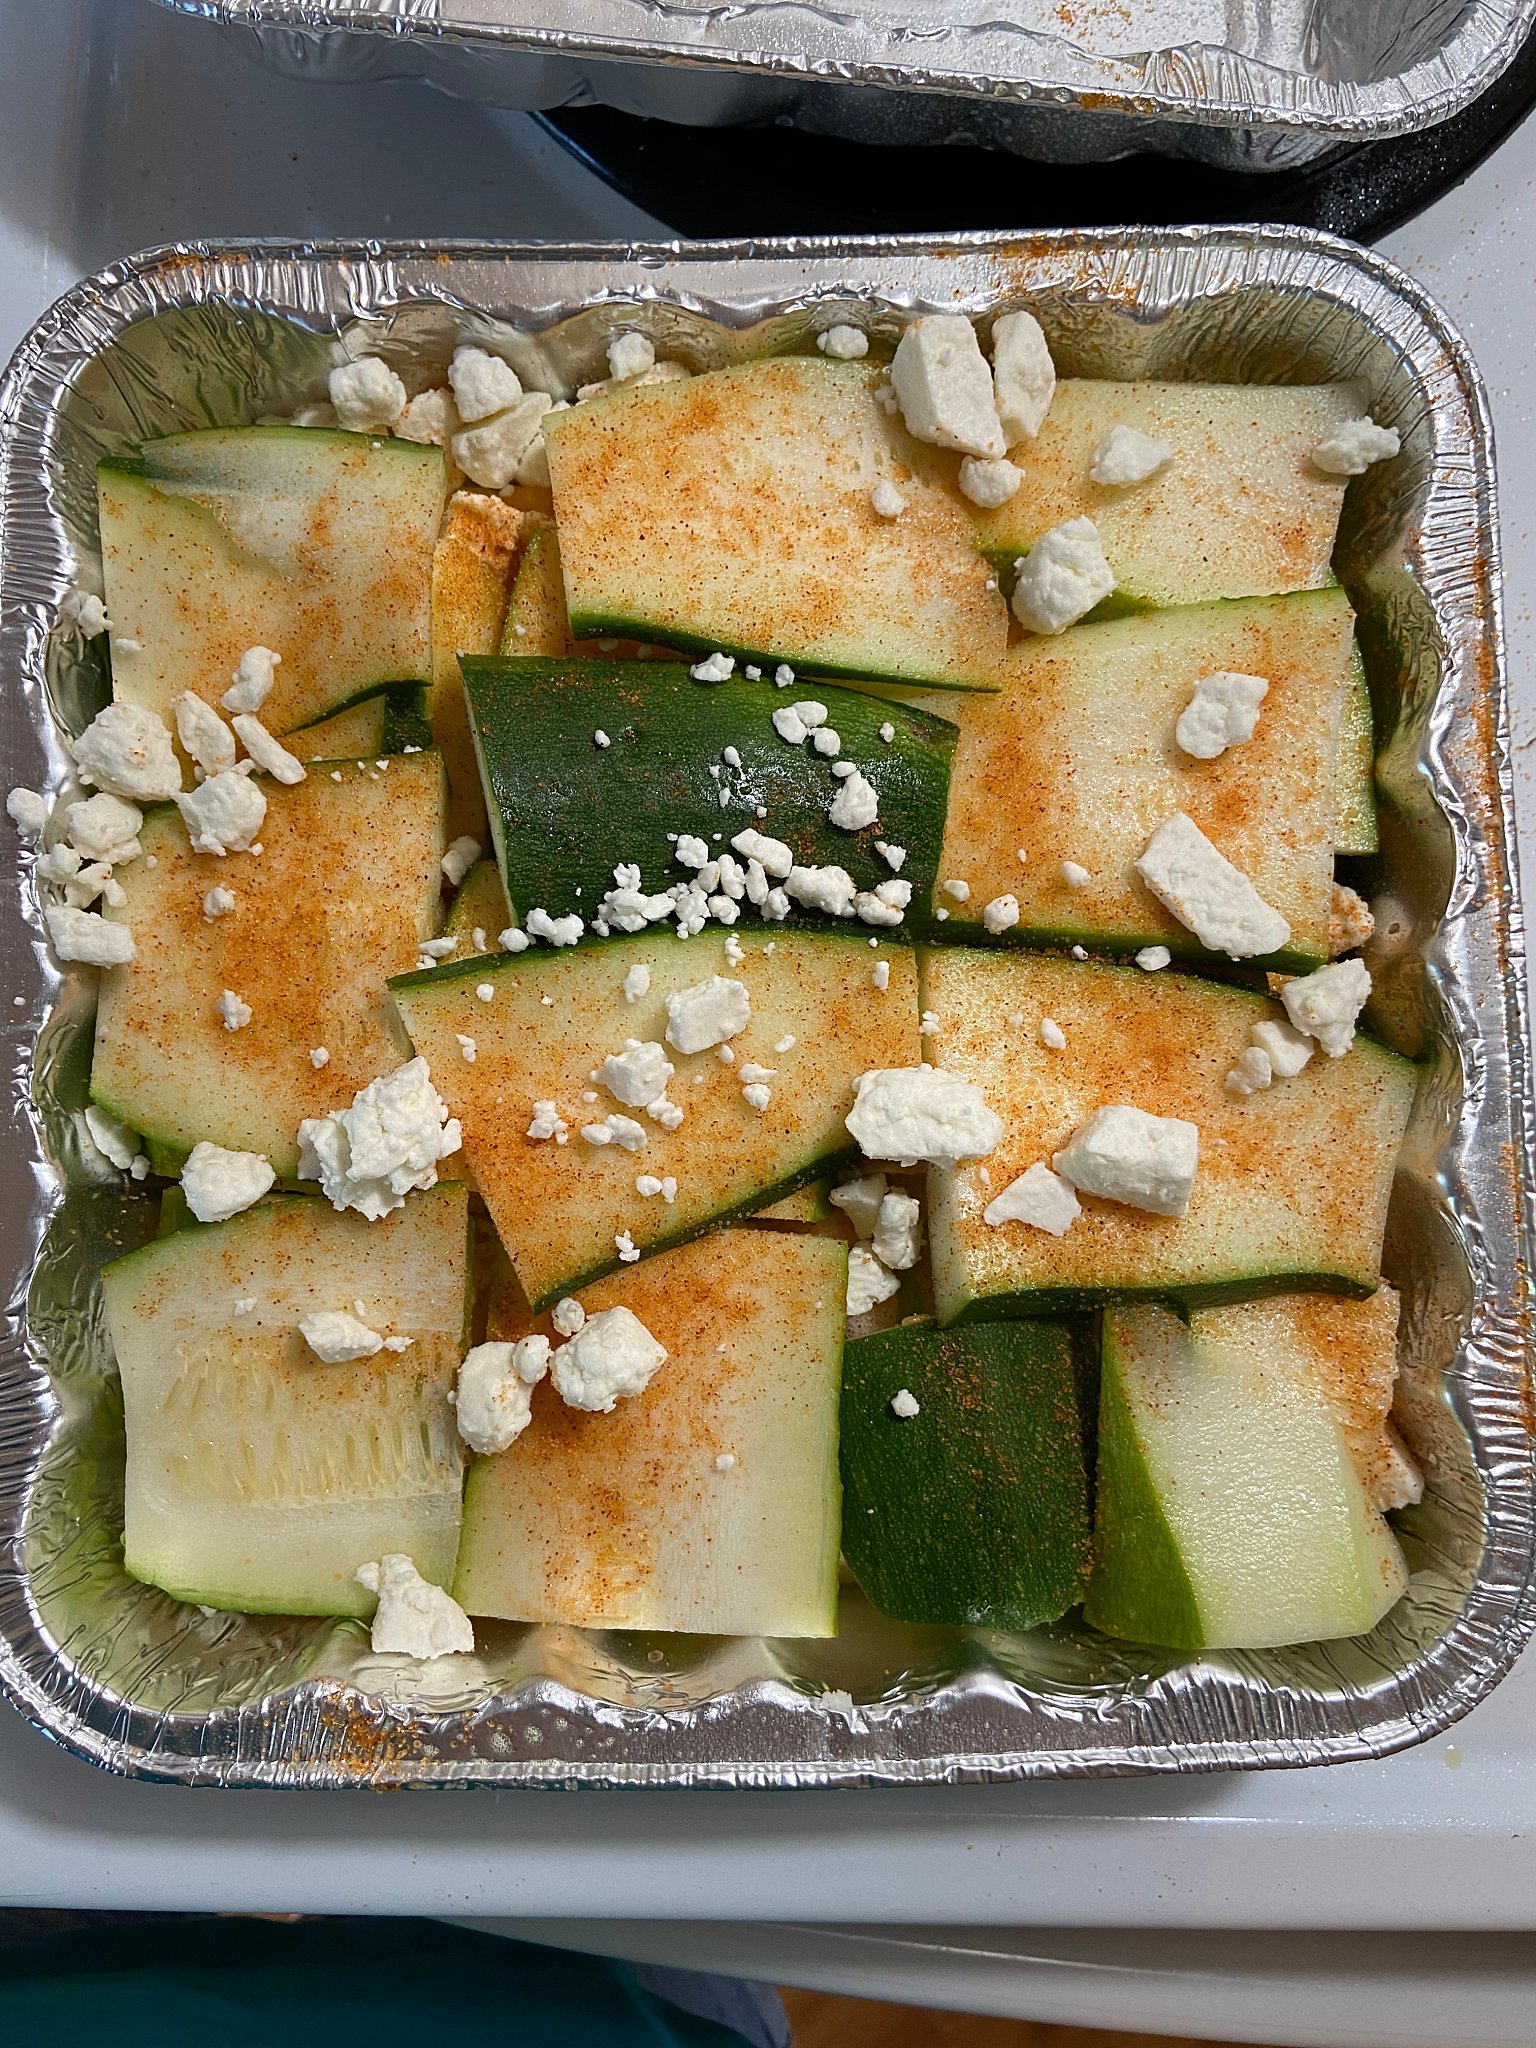
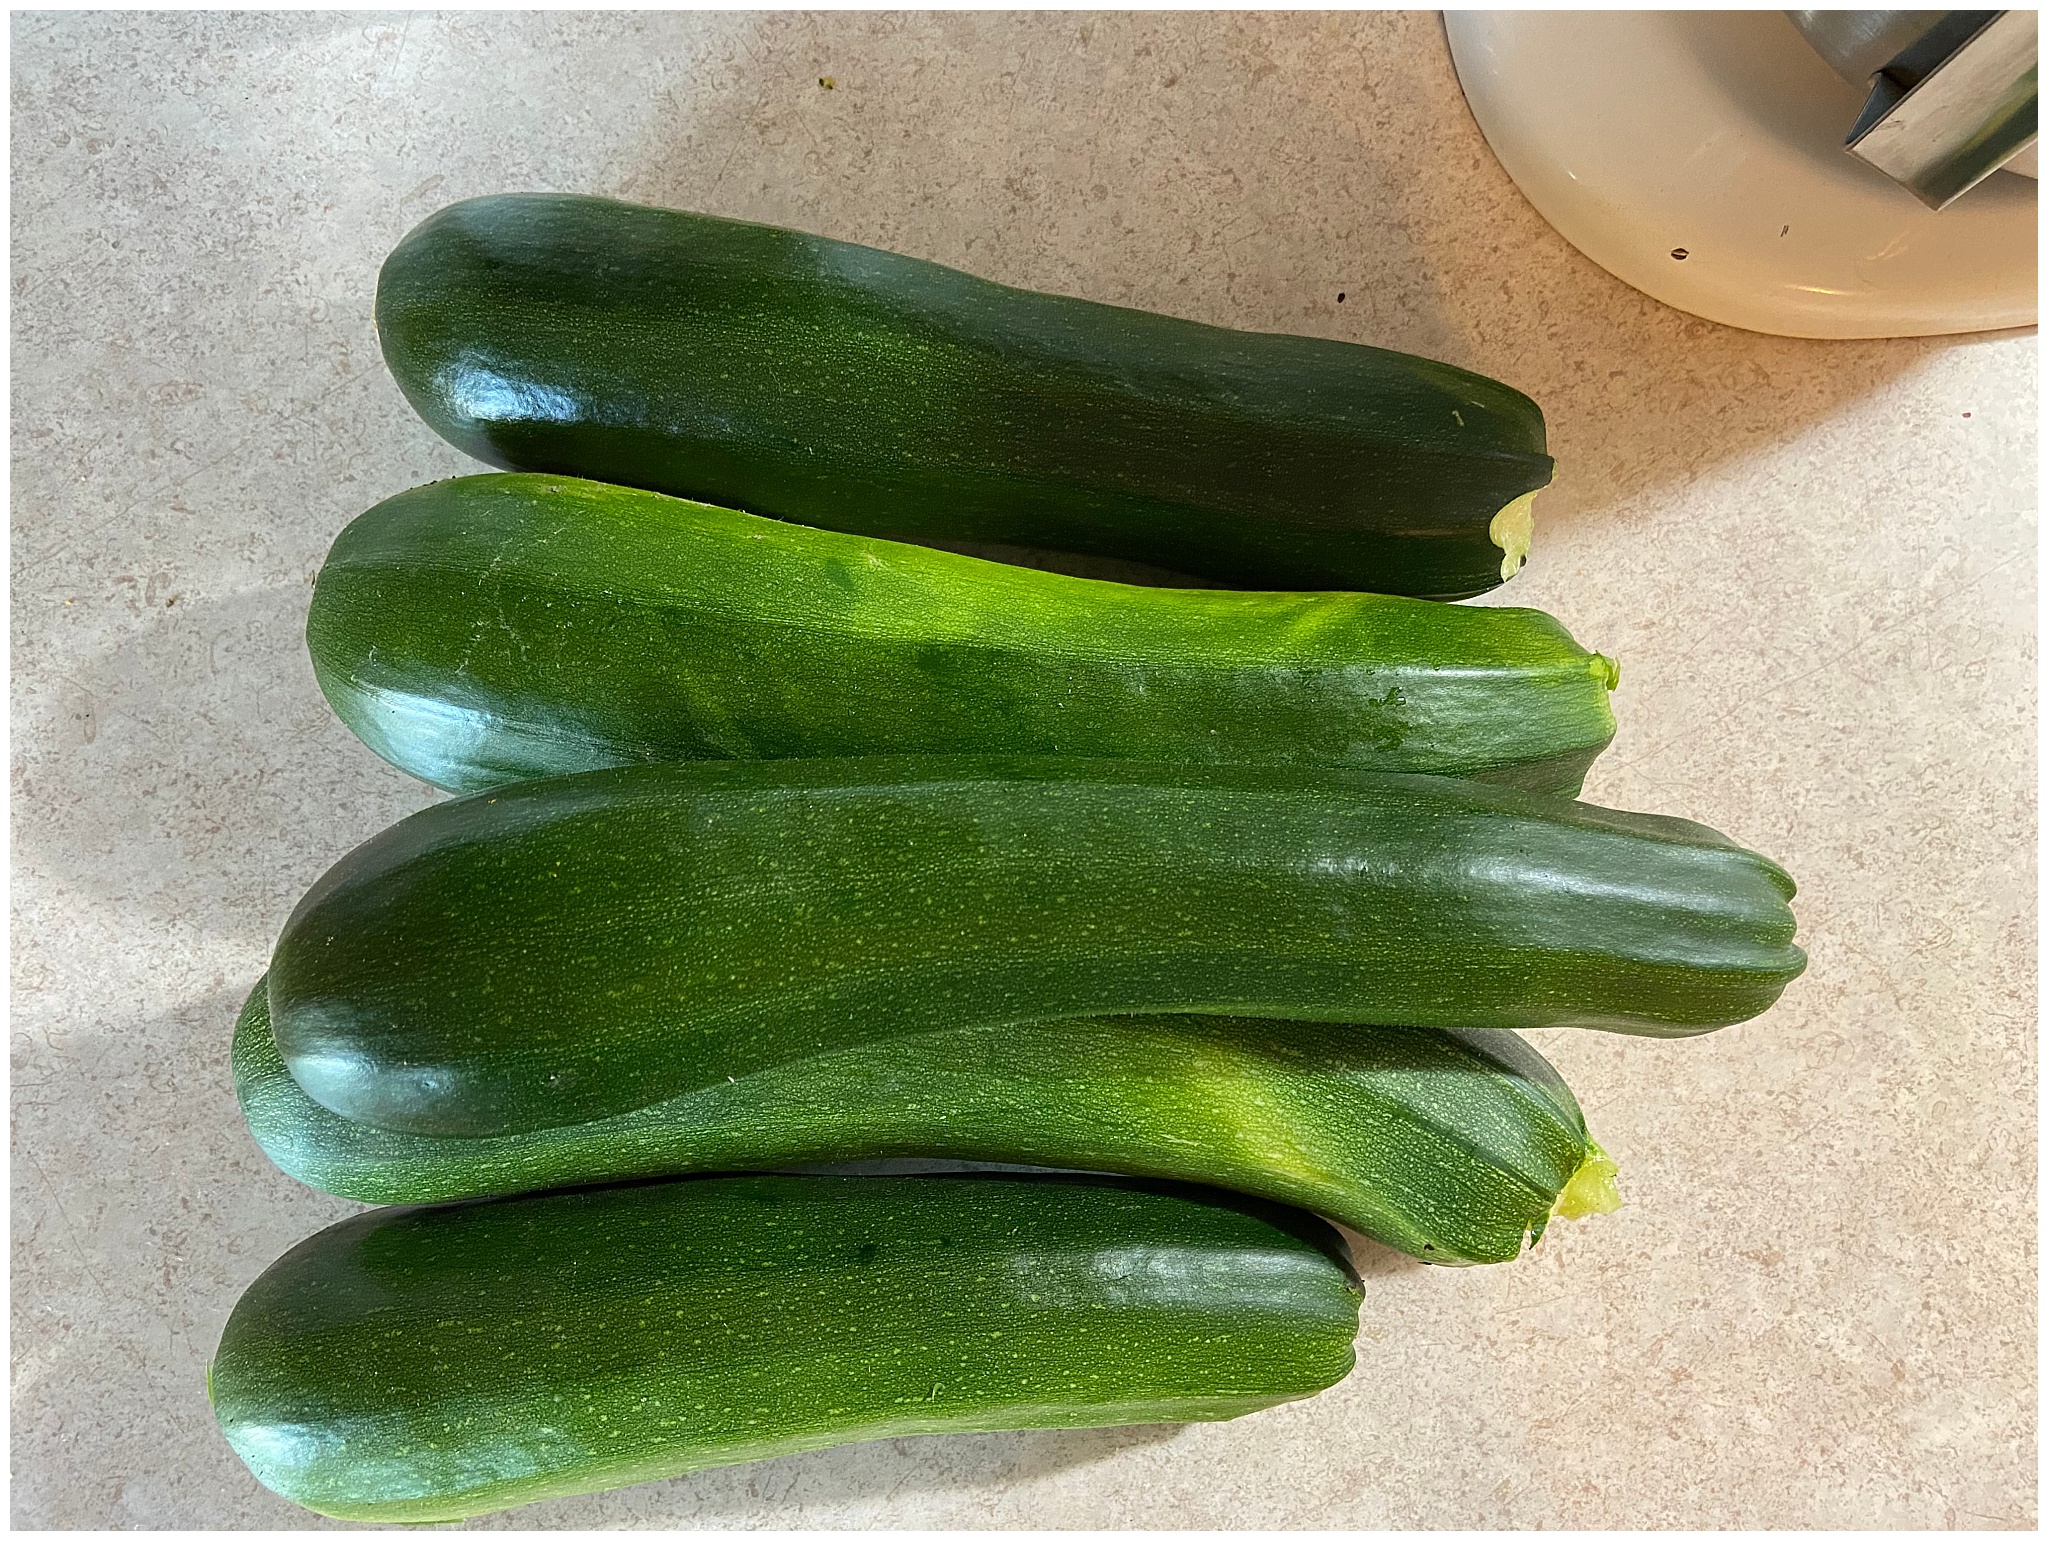
ITALIAN ZUCCHINI CASSEROLE

Zucchini the most prolific veggie of summer.  It seems everywhere you can find zucchini during the summer.  And if you grow zucchini, you’re probably looking for dishes to make with it, and friends to share.  When my husband shared zucchini with a co-worker who is from a New Jersey Italian family, he shared his recipe for Italian Zucchini Casserole.  It’s so easy to make and quickly became a family favorite.

Italian Zucchini Casserole is fabulous straight out of the oven.  It’s also easy to freeze for enjoying throughout the winter.    It took some experimenting to figure out the best way to prepare the casserole for freezing.  We tried making the casserole and putting it directly in the freezer uncooked.  Zucchini is such a water dense vegetable, that prep and freeze resulted in a very soggy casserole.  We found that cooking the casserole for half of the recommend time and then freezing worked well.   Then simply thaw and bake the casserole until done.

INGREDIENTS:

Fresh zucchini–sliced

Parmesan cheese

Feta cheese

Mozzarella cheese

Parmesan, Asiago and Romano cheese blend

Lawry’s season salt

Italian seasoned bread crumbs

DIRECTIONS:

When I first started making this recipe it really through me for a loop because it doesn’t have specific measurements.  I really like to follow a recipe the first time I make a new dish.  So I jumped in and followed the directions passed on to me.  It’s fabulous, flexible and easy to make!  And I’ve provided you with some additional tips and guidelines.

For a family of 4 I use an 8×8 baking dish.  I like to make a second batch in a disposable pan at the same time for freezing.

  • Preheat oven to 350
  • Spray pan lightly with cooking spray
  • Place zucchini slices in pan in two layers
  • Sprinkle with bread crumbs, season salt, and Parmesan cheese to taste
  • Repeat layers of zucchini, bread crumbs, season salt and Parmesan cheese to near the top of the pan.
  • Top with mozzarella cheese

This summer I mixed things up a bit with the modification below

  • 2 layers of zucchini slices
  • Sprinkle on Feta cheese and season salt
  • 2 layers of zucchini slices
  • Sprinkle on Parmesan cheese and season salt
  • Top with mozzarella or Parmesan, Asiago, Romano cheese blend

I love the addition of Feta cheese!  The updated modification seems to reheat better.  I even made an entire 9×13 pan of it and it was great!

Some cell phone pictures I snapped as I put the dish together.

Italian Zucchini Casserole

Bake for 30-45 minutes until zucchini is tender and cheese on top is browned.

To freeze: Bake 15 minutes, allow to cool completely before covering and freezing.  To cook:  Take casserole directly from oven and place in oven.  Bake 30-45 minutes until warmed through and cheese on top is browned.

For an interesting article on growing your own zucchini :   Growing Zucchini

blessings,

Julie

Grandma’s Zucchini Bread

For years I made my grandma’s zucchini bread wrong!  I followed the recipe, I just didn’t realize it was wrong.  For years we had short half full pan loafs of grandma’s zucchini bread.   I just though that was how it was supposed to be.   Then I tried a recipe for  chocolate zucchini bread.   The chocolate zucchini rose nicely into a full-size loaf!  It was then I realized grandma’s zucchini bread was missing the key ingredient of baking soda!

It’s that time of year again, when zuchinni plants are growing huge and the zuchinni harvest is non-stop!

Grandma's Zucchini Bread

So if you’re wondering what to do with all that zuchinni….  I’ve found zuchinni bread is a great way to use up the overgrown zuchinni that hide in the garden until they reach mammoth size!  Simple cut out the seeds and shred the rest.  I wash the zuchinni well before cutting it open and even include the skin in the shredding for extra vitamins.

Grandma wasn’t a health nut, so this isn’t a healthy recipe, but I’m including healthier modifications at the bottom.  I haven’t baked any zuchinni bread this year, so I’ll have to come back and update the blog with pictures of the finished product.  🙂

Ingredients:

¾ cup oil

3 eggs

2 cups sugar

2 cups flour

½ teaspoon baking soda

1  teaspoon baking powder

1 teaspoon salt

3 teaspoons cinnamon

2 teaspoons vanilla

½ cup nuts-chopped*

½ cup raisins*

2 cups grated zucchini

*Optional

Directions:

Mix flour, sugar, baking soda, baking powder, salt and cinnamon–set aside.  Mix oil, eggs, vanilla.  Combine wet and dry ingredients.  Stir in nuts, raisins and zucchini.  Divide and pour into two greased and floured pans.  Bake at 350 for 1 hour 15 minutes, until toothpick inserted in the middle comes out clean.

For a healthier version! of Grandma’s zucchini bread 🙂

¾ cup total  of a 50/50 blend of applesauce and oil

3 eggs

1½  cups sugar

1 cup all-purpose flour

1 cup whole wheat flour

½ teaspoon baking soda

1  teaspoon baking powder

1 teaspoon salt

3 teaspoons cinnamon

2 teaspoons vanilla

1 cup nuts-chopped*

1 cup fresh blueberries*

2 cups grated zucchini

*Optional

Bake as directed above.

Either way this Grandma’s zucchini bread is a delicious way to use up some of that summer zucchini!  My husband has a summer birthday and zucchini bread is his choice for birthday “cake”.

spoon of guilt free jam

Guilt-Free Jam

Jul 5, 2022

Do you love jam and jelly, but would like a healthier alternative? Or maybe you’re like me and buy a little more produce than your family can eat before it goes bad. 
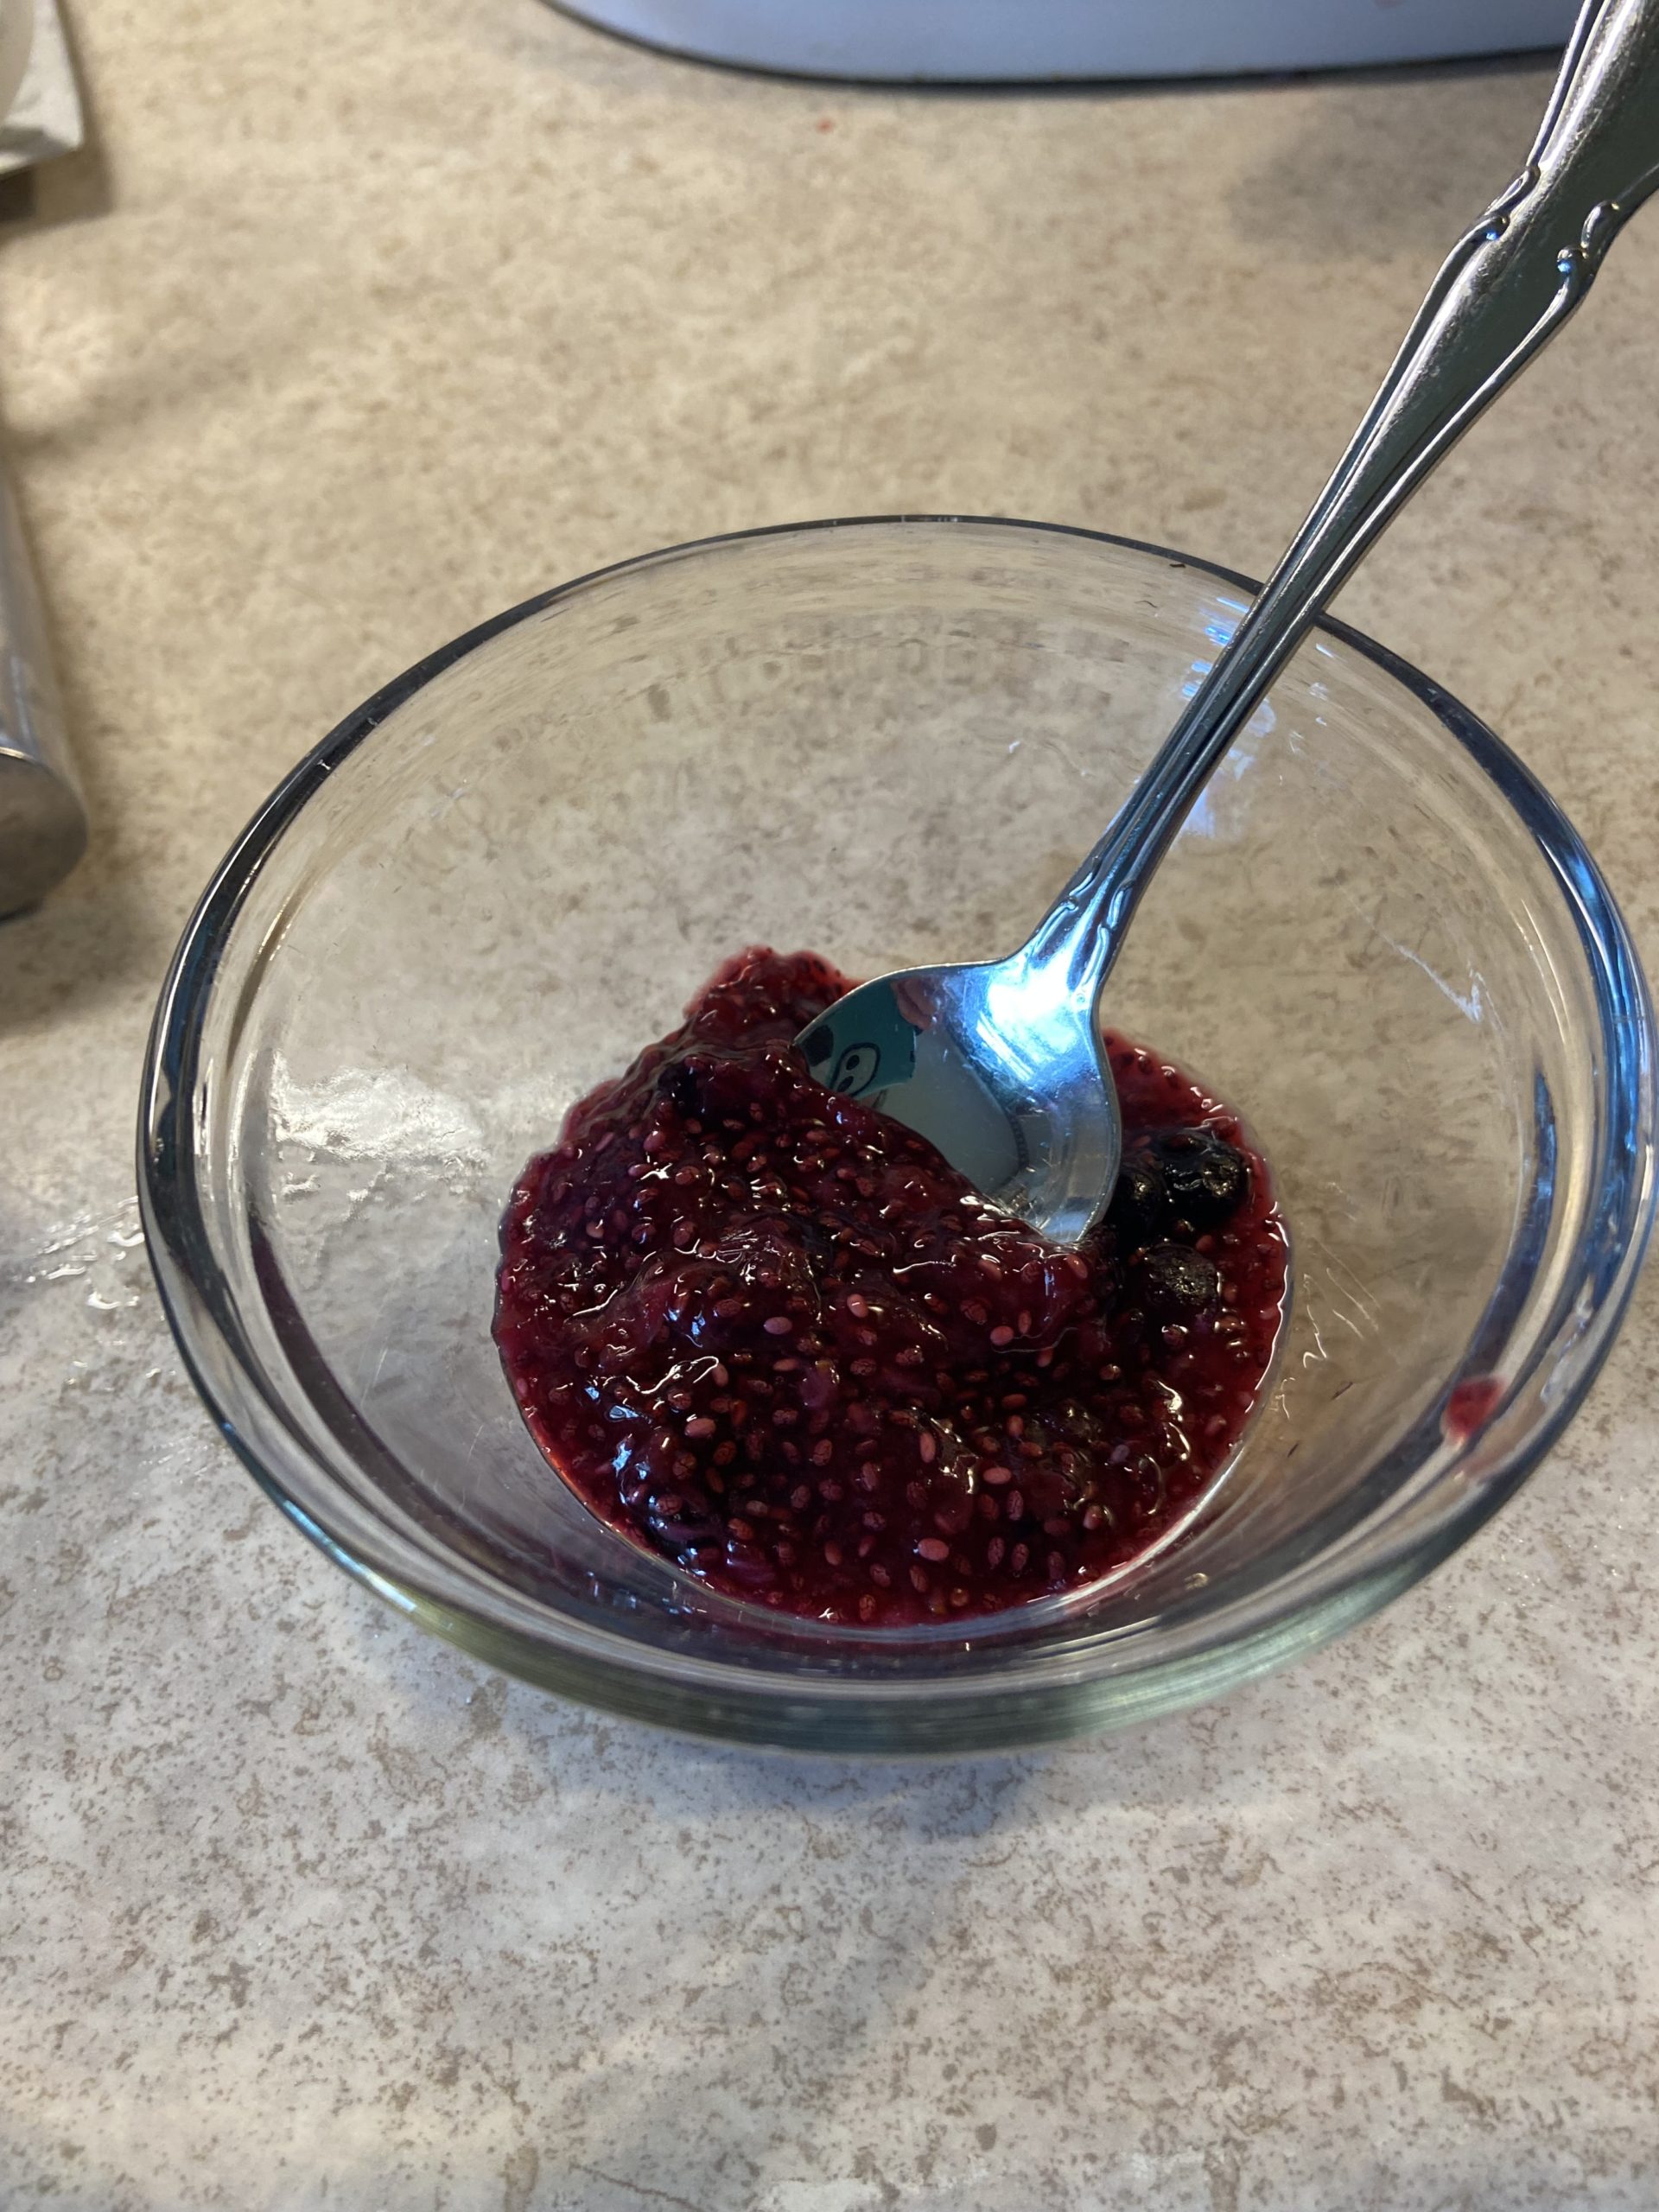
The last time my produce drawer was a bit too full, I made a guilt-Free Jam, that I absolutely loved!

Chose your fruit

The recipe is based on one found online, with a few modifications. I had strawberries, blueberries and a mango that needed to be used before they were too far gone. A few frozen blueberries were also added to get just the right flavor.

Softened fruit just before adding chia seeds.
making guilt free jam
Adding frozen blueberries!

First choose your fruit, weather it’s growing in your garden, already in your fridge, or you’re heading to the store. You’ll want to choose fruits that fit your preferences and have flavors that blend well together.

You’ll also need agave syrup, chia seeds, lemon juice and vanilla extract. No pectin needed!

The agave syrup will sweeten your jam. Chia seeds will act as your thickener. While lemon juice and vanilla extract will both enhance the flavor of the fruits you choose.

Let’s get to the specifics of the recipe!

The Recipe

  • Fruit of choice
    • For each pint of fruit, you need the following:
  • 2-3 tablespoons agave syrup, depending on how sweet you like your jam
  • 3 tablespoons chia seeds
  • 2 tablespoons lemon juice
  • 1 teaspoon vanilla extract
  • Salt (optional)

Directions:

Remember all measurements are per pint of fruit you’re using.

  • Cut up fruit into bite size pieces/slices
  • Place fruit and agave syrup into sauce pan
  • Bring the mixture to a simmer over medium-low/medium heat
  • Simmer for 5 minutes, stirring frequently
  • Once fruit is softened, mash in pan using meat mallet, fork, potato masher, etc.
  • Turn heat to low and stir in chia seeds
  • Cook an additional 5-10 minutes, stirring frequently, until desired consistency is reached

  • Once desired consistency is reached, remove from heat
  • Stir in vanilla extract and lemon juice.
  • Add a pinch of salt and additional agave to taste if desired

After cooling, pour jam into sealable containers and store in refrigerator.

Notes:

I used this recipe using roughly 3 pints of fruit, which yielded approximately 2 pints of jam. If you adapt it to a large batch please let me know your results!

I typically can my jam, but did not with this batch. I will update this post once I have canned a jam made using this recipe. My jam stored well in the refrigerator for several weeks.

Citrus fruits are different from other types of fruits and usually are made into marmalade. i.e. orange marmalade. I’ve never made marmalade or any jam using a citrus fruit. I wouldn’t recommend this recipe for citrus fruit. If you decide to try it please let me know your results!

No Guilt

If you love jam, but not the sugar and calories, this a great option for you! Quick and easy to make. Pure fruit, added plant based protein from chia seeds and a minimal amount of natural sweetener you can enjoy this jam with absolutely no guilt, knowing you are fueling your body well!

Find gardening and sustainable living tips on my website: Simple Living by Simply Julie Co.

Original recipe from Showmetheyummy.com

Loading up the landfill

Emptying the container of my typical laundry soap, it hit me home much waste is generated just in the laundry soap container itself. That lead to, homemade laundry detergent!

The average family of 4 persons in the United States of America performs eight to 10 loads of laundry each week. That means every 7-10 weeks each family adds at one laundry detergent container to their waste.

According to the latest census data published in February 2022 there are 83.6 million families in America. A family is defined as two or more people. So yes, the statics includes families of less than 4, but also include families of more than 4 so I think it all evens out in the end. That means America potentially generates an average of 527,874,286 of waste just in laundry detergent containers every 7-10 weeks. That’s 3,436,949,551 laundry detergent containers per year!!!

Options

So what are the options if you want to reduce your waste?

No laundry While it sound nice, let’s just agree that wearing un-washed clothes in NOT a viable option.

Using eco friendly laundry detergent…. I’ve found even the eco-friendly laundry detergent companies put their liquid laundry detergent in plastic containers. Glass would be cost prohibitive to them, so that leaves them with plastic containers as their best option.

Laundry detergent strips… While these generate little waste and are eco-friendly, they didn’t work for me. I tried two different brands of laundry detergent strips, and didn’t care for either brand. In my opinion, they didn’t remove stains as well as my typical detergents.

The detergent strips also seemed to interfere with the seal of our front-loading washer. Possibly they left a film on the seal, causing the door to leak? I tried dissolving the strips in hot water before using, and that did not seem to change my results. Even with regular cleaning of the seal, the door leaked more frequently when using the laundry strips than when using my regular detergent.

The laundry strips are great for washing items by hand or easy to pack for vacation. So there are some definite pros to this option.

Homemade laundry detergent… Since the other options didn’t work for me, I looked at making my own laundry detergent. The ingredients come in cardboard and paper containers so they will break down in a landfill, can easily be recycled, shredded or burned. This seemed like the best option to me.

Homemade Laundry Detergent Recipe

I modified a homemade laundry detergent recipe I found at DIY Natural. I used:

Ingredients

  • 5 ounces Dr. Bronner’s shaved bar soap
  • 17.5 ounces Borax
  • 17.5 ounces Arm & Hammer Washing Soda
ingredients for homemade laundry detergent

Instructions

  1. Measure Borax and washing soda on a kitchen scale
  2. Shave bar soap with typical kitchen grater.
  3. Thoroughly stir together for several minutes or shake very well in a sealed container.
  4. DIY Natural also suggested “You can take this a step further and blend the mixture in a blender or food processor to create a powder that will dissolve easily even in cold water. (Just be sure to let the dust settle before removing the lid of your blender or food processor so you don’t inhale the fine particles.)”
  5. Store in a sealed container.
  6. Use approximately 2 tablespoons per large load. (Adjust accordingly if you’re doing a small load or a heavily soiled load, i.e. 1 and 3 tablespoons). You also may need to use the larger amount if you have hard water.

I choose to use Dr. Bronner’s lavender scented soap but there are several scents as well as unscented. For a less expensive option you can try Fels-naptha laundry soap bar or Ivory bar soap.

I choose not to put soap in my food processor, to avoid any possible lingering soap taste in the future, because I plan to make this my go to laundry detergent. I pour my detergent into an canning jar with measurements on it, add hot water and shake until mostly dissolved. This is just my personal preference, to make sure all the ingredients are dissolved and distributed evenly.

The Results

I have loved using this laundry detergent! I has been excellent at getting stains out. It’s gardening season so lots of grass stained knees. To test it out, I put a pair of my grass stained jeans in the washer UNTREATED. No pre-rinsing, no stain remover, not even some extra detergent directly on the stains. I was super impressed! The stain came out almost completely even in a cold wash! I really had to look to see it at all! With a second wash the grass stain came out completely!

Our clothes are clean, soft and we are generating less waste. This is a win on all fronts for me! As a bonus, I found a wonderful use for this Tupperware container from my childhood!

For more tips are sustainable living, gardening, etc. check out the rest of the blog or

Return to Simple Living by Simply Julie Co.

Homemade laundry detergent recipe adapted from: https://www.diynatural.com/

Choosing Plants for your Vegetable Garden

There are so many wonderful vegetables to grow.  It can make choosing plants for your vegetable garden a daunting task.  So how do you choose which plants to grow in your own vegetable garden?   As you’re considering plants first and foremost make sure they are compatible with the basics of your garden.   If you don’t know those already, read Planning A Garden to help you determine the basic attributes of available space.

How do I Know What a Plant Needs?

When purchasing plants or seeds, information should be provided on needs of the plant.   Plants at a large retail center will usually have small sticks/tags in each container giving the details of the plants needs.  The same information is also available for each plant when shopping a seed or plant website.  If you’re shopping small scale or private vendors, i.e. a local nursery, or on Etsy, you may need to ask for this information.

Take a Look in Your Pantry

A great place to start in choosing plants to grow is to look at what’s in your pantry.  What do you use frequently when cooking meals?   Do you stock up on canned tomatoes, every week?  Grow tomatoes?  Are green beans a staple for you?  Grow those?   Do you have a favorite fruit or vegetable you only buy on occasion because it’s pricey?  The produce you buy regularly, or would if the budget allowed, is a great place to start when considering which vegetables to grow in your own garden.

Remember, it’s important to make sure your plants are appropriate for your garden area.    We always have carrots on hand, so we tried growing them years ago.  Through trial, we found our dense clay-like soil, was not a good match for growing carrots.  We tried a couple of years and then took carrots off our list of possibilities.   This year I’m adding raised beds to our gardening area and going to try carrots in those.

Start Small and Simple

It’s best to start small with a few easy to grow plants.  This will set you up to be successful with your gardening experience.   Tomatoes, zucchini, green beans are typically all easy to grow garden staples.    If you like cherry or grape tomatoes, I’ve found those to always be prolific.  Roma tomatoes are nice mid-sized meaty tomato that are great for canning, making tomato sauce, salsa, etc., but don’t make great sandwich tomatoes.   Of the typical slicing tomatoes, I’ve found the mid-sized do best in our garden.  They tend to do well and ripen completely while on the vine.  The larger slicing tomatoes, tend to split or crack before ripening completely in our garden.

I found this list of the 8 Easiest Vegetable to Grow.    A couple notes to add to this list…

Even though spinach is on this list, I did not have success with it last year.  Spinach is a cool weather crop.   I started my spinach from seed and the temperature in our growing area became too hot and my seedling bolted and went to seed before I even got them in the ground.  This was definitely due to user error, on my part!  Still, the packet of seeds cost less than a container of spinach.  I learned a valuable lesson and still have seeds that I started this year.  I’m watching the temperature much more closely.

The above article suggests starting summer squash inside.  I started a few zucchini plants inside to get a bit of a “head start.”  While great in theory, I found that these plants didn’t perform any better, maybe even not as well, as the plants we sowed directly from the same seed packets.  That said, we don’t like yellow squash, so I have only grown zucchini, not yellow squash as mentioned in the article, both are considered summer squash varieties.

Space and Budget

How much do you want to spend on your garden venture?  Seeds are far cheaper than plants when looking at the cost per plant, but require work up front well before planting.    Starting from seed will be covered in later blog posts.  Some seeds needed to be started indoors between 6-10 weeks before the last frost in your area.  Some seeds, like zucchini and green beans, are direct sow seeds, that you plant directly in the ground after the last frost.

When choosing the number of  each vegetable to plant, look at the spacing needs of what you’ve chosen to grow.   It’s always tempting to try to pack in as much as possible.  (Guilty!) However, the plant spacing is indicated by the expert for a reason.  Following the spacing guidelines will give your plants the room they need to thrive.   This space provides, for proper air circulation and helps insure the plants won’t be competing with each other for light or soil nutrients.   I’m going to have to try remind myself of this when we put our plants in the ground this spring.

Some plants provide varieties for different spaces.  For example green beans come in pole bean and bush bean varieties.  Pole beans take up less ground space, however you need to provide a structure for them to grow up.   Bush beans are small bush-like plants that don’t need a structure, but need space for each plant.

You can also grow some typical ground vining plants up a sturdy trellis.  We’ve grown zucchini and butternut squash on the ground and up a trellis; both work very well.  I found it was easier to see zucchini growing up a trellis.  We’ve definitely had some zucchini that seem to be hidden by the leaves, until they were HUGE!  Which are the perfect size for making zucchini bread out of!  If you’re now craving zucchini bread, like me, check out this recipe from my grandma: Grandma’s Zucchini Bread

Want more garden tips?  Sign-up here so you don’t miss a post! Get more gardening tips

Return to Simple Living by Simply Julie Co.

Happy gardening!

Planning a Garden

Whether you start your plants from seed or purchase them locally grown, every gardener is excited to get their plants in the ground and watch them grow!  However, to have a thriving garden vs. a lot of frustration takes some planning.  You can make a detailed plan or a loosely outlined plan.  There a few key factors to keep in mind with all gardens.

The all important zone!

First you need to determine which hardiness zone your will be planting in.   “A hardiness zone is a defined  geographical area in which specific categories of plant life not only tolerate, but are also capable of growing in, based on average climate conditions (primarily, minimum average temperature) for each zone.” — from the USDA website.    The hardiness zones are determined by the USDA and provide a standard/continuity across all plant growing/purchasing platforms.  You can find  your hardiness zone here: Hardiness Zone Map

Determining your hardiness zone before purchasing seeds or plants will help insure that you won’t unknowingly try to grow a plant that is not meant to survive in your area.  The few minutes this takes can save  you lots of frustration in the future.

What’s your soil like?

It’s also important to be familiar with your soil before planting.  If you are planting in containers, just be sure the potting soil you’re purchasing says it’s appropriate for what you’re growing and you’re good to go. You can purchase a kit to determine the composition, acidity, etc. of your soil.   However, it’s best to start by simply looking at the dirt in your planting location, and that’s what I’ll discuss in this post.  Good soil is  dark, rich and loose.   Is your soil heavy and clay like, sandy, or beautifully rich and dark?  Does your soil drain well, or does it tend to be consistently wet or dry?    All of these things are factors to keep in mind as you are planning your garden.

How much sun?

Most, if not all,  vegetables require full sun.  What does that even mean?   “Full sun” definitely means at least six hours per day, but some plants such as vegetables really need eight to ten hours per day. “Partial sun” or “partial shade” means that the plant needs 3-6 hours of direct sun per day. The terms sometimes are used interchangeably.” – according to a recent Google search. 

If you’re planning a vegetable garden you’ll clearly want to plant in a space that has sun most of the day.   If you’re planting flowers, you want to determine the sun available in each planting location and then choose flowers with the appropriate sun requirements.

Now that you have the basics of planting location you can begin to decide what you want to plant.  Grab your Burpee’s catalog!  I love to flip through the catalog and circle my favorites, and go back later to make a more definitive list.

In the next post we’ll talk about tips for selecting the plants you’ll grow.

Return to Simple Living by Simply Julie Co.

Happy garden planning!

Julie