
What is Gauge?
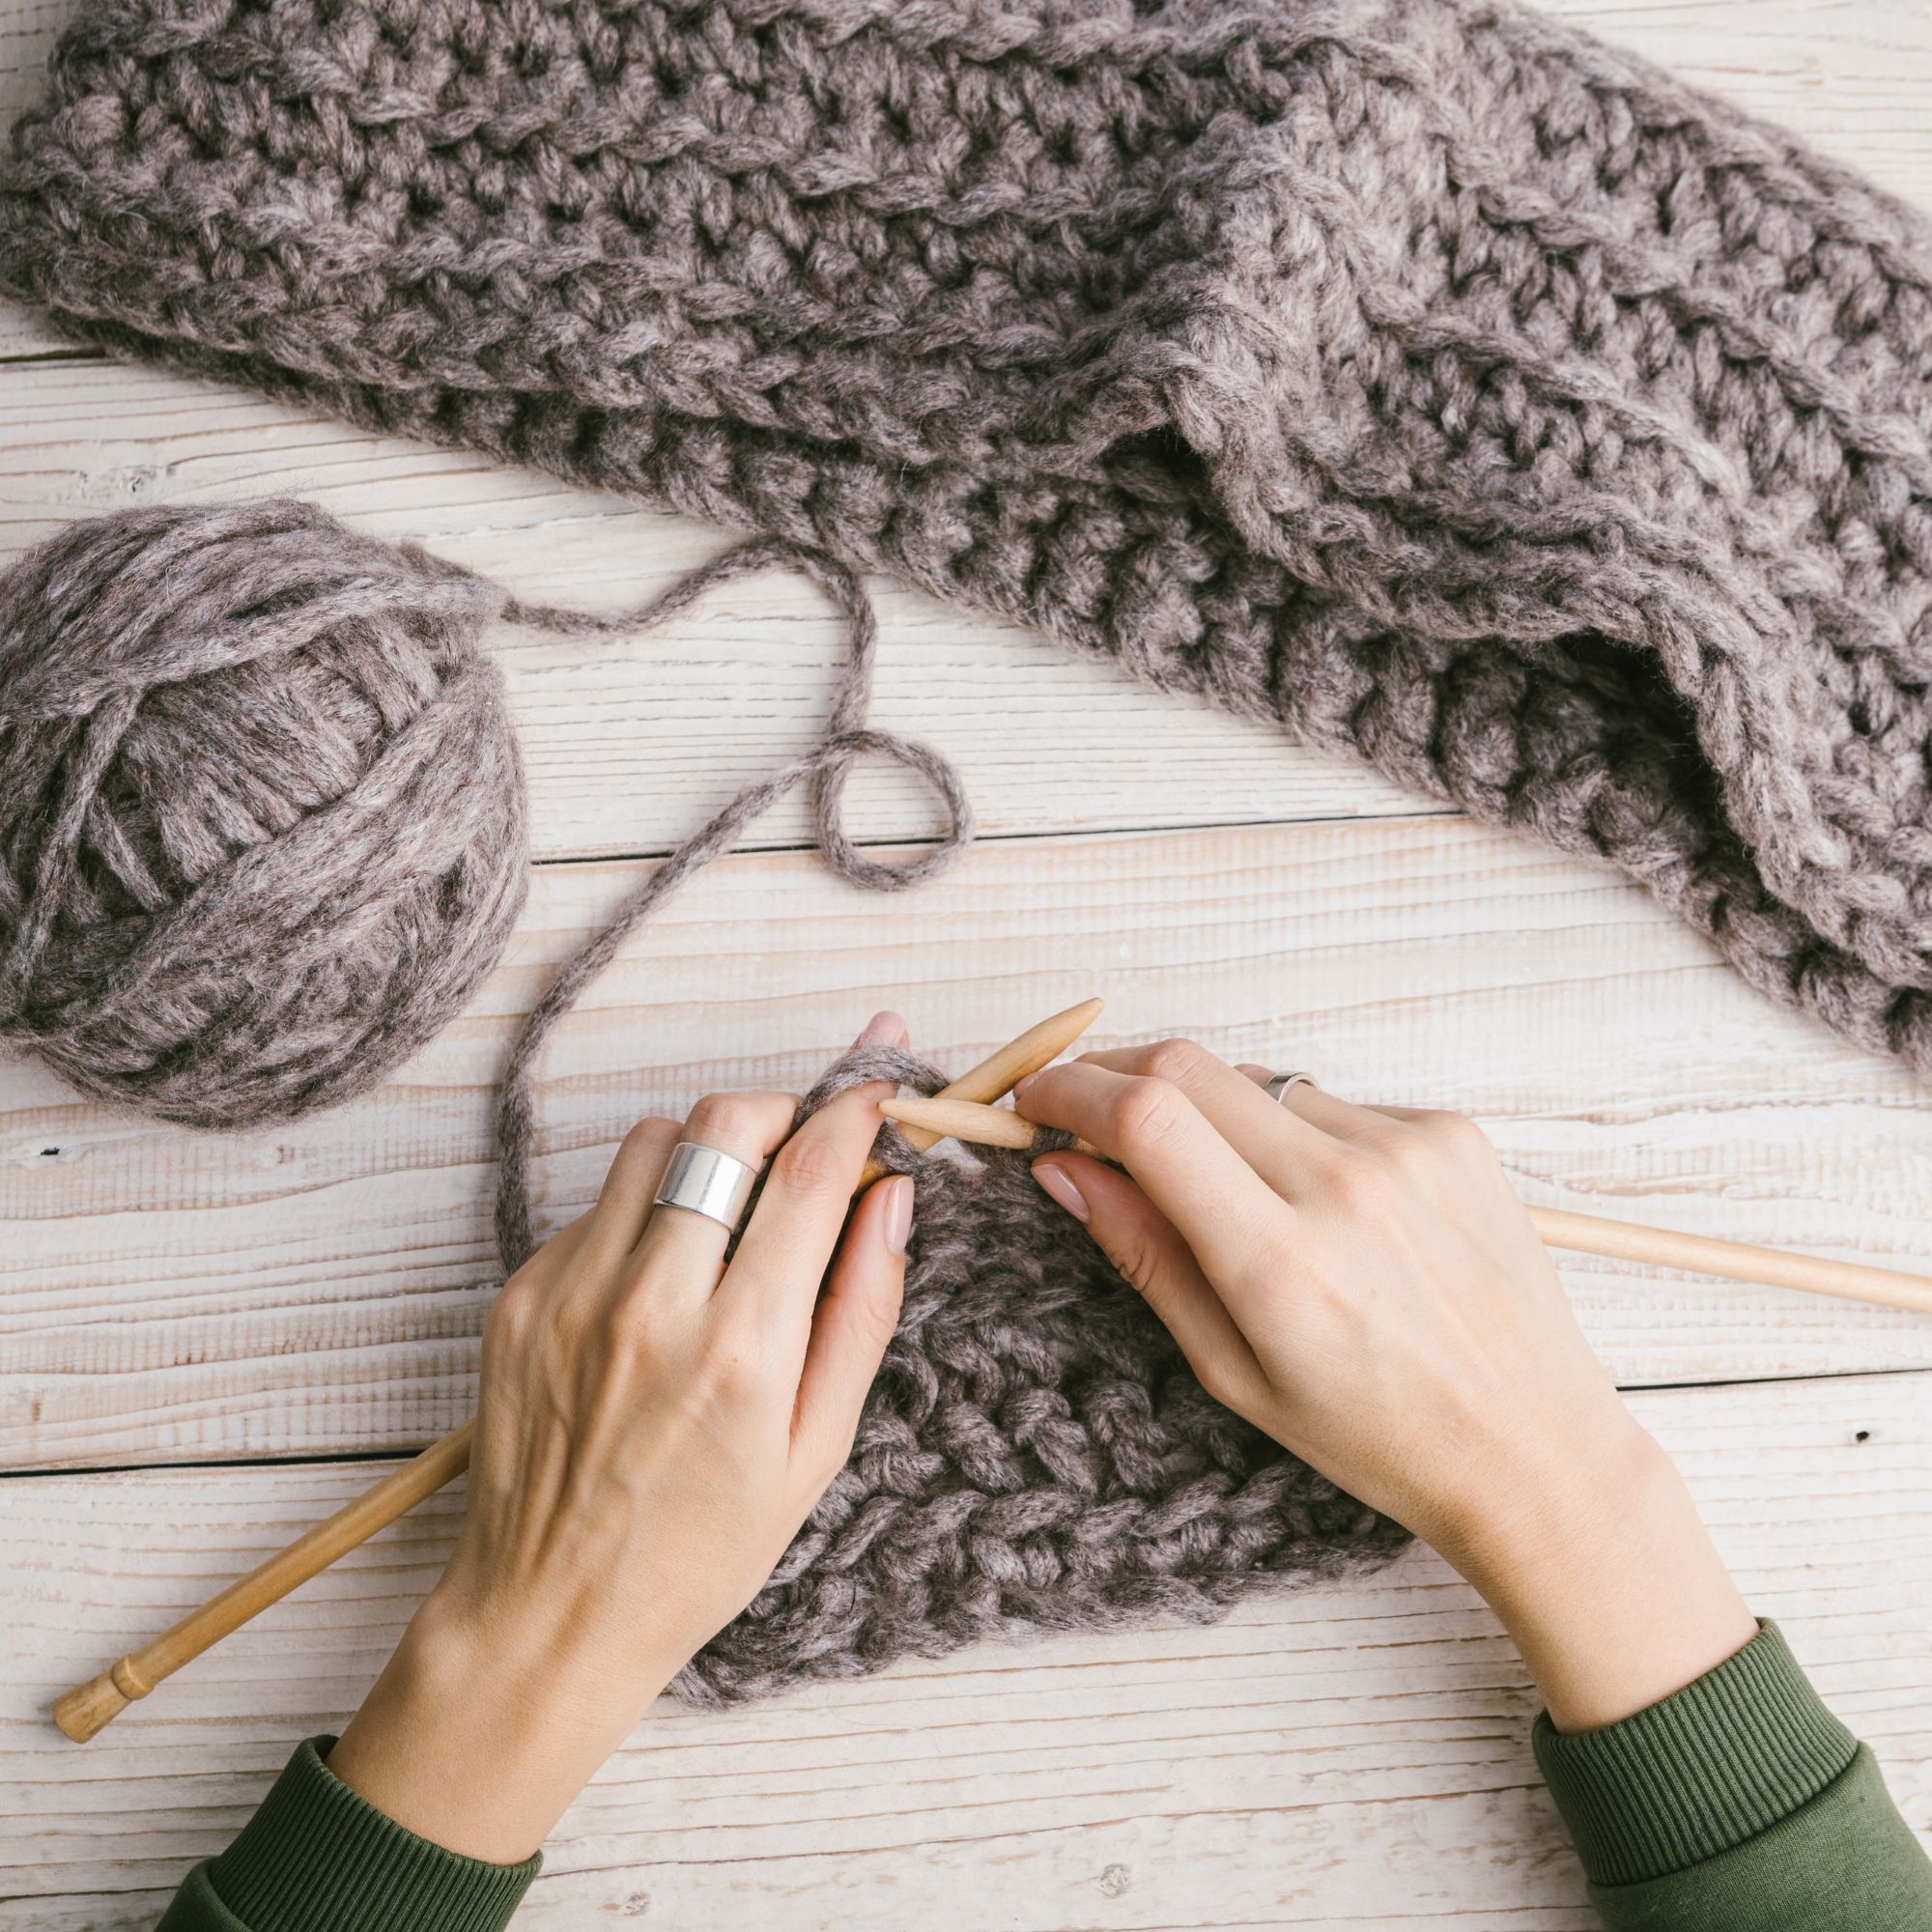
Today were going to talk about one of the knitting basics: understanding gauge. In knitting gauge refers to the tension, tightness or looseness, of hand knit stitches. Imagine you have a square inch of fabric. The gauge tells you how many stitches you would make across and how many rows you would make vertically within that square inch.
This post will help you understand gauge
- what knitting gauge is
- how to determine your own gauge
- what factors influence gauge
- how to adjust your gauge to insure your finish project is sized appropriately
Gauge is important because it determines the size of your finished project. If you have too few stitches and rows in your gauge, your fabric will be too loose and your project might end up larger than intended. If you have too many stitches and rows, your fabric will be too tight, and your project might end up smaller. That sound backwards? Let’s see how this works.
How do I know what MY gauge is?
Gauge is determined by how many stitches are used in a specified measurement. Typically gauge is listed as stitches per 4 inches. For example, (for me) it takes 10 stitches of super bulky yarn on size US 13/9.0mm needles to make 4″. Each knitter has their own unique gauge, depending on how tight or loose your knit stitches are.
To measure YOUR gauge you will knit a swatch. A swatch is a small sample piece you knit to know before beginning your project, to what your gauge is. The typical swatch size is 4″ wide by 4″ tall. This allows you to count the number of stitches in a 4″ row and the number of rows that make up 4″.
To create your gauge swatch, follow the instructions in your knitting pattern. The pattern will usually tell you which stitch to knit your gauge swatch in. The pattern will then specify a the number of stitches and rows that should fit into the given measurement, often a 4-inch square. You then knit a sample swatch according to the pattern using the recommended yarn and needle size.
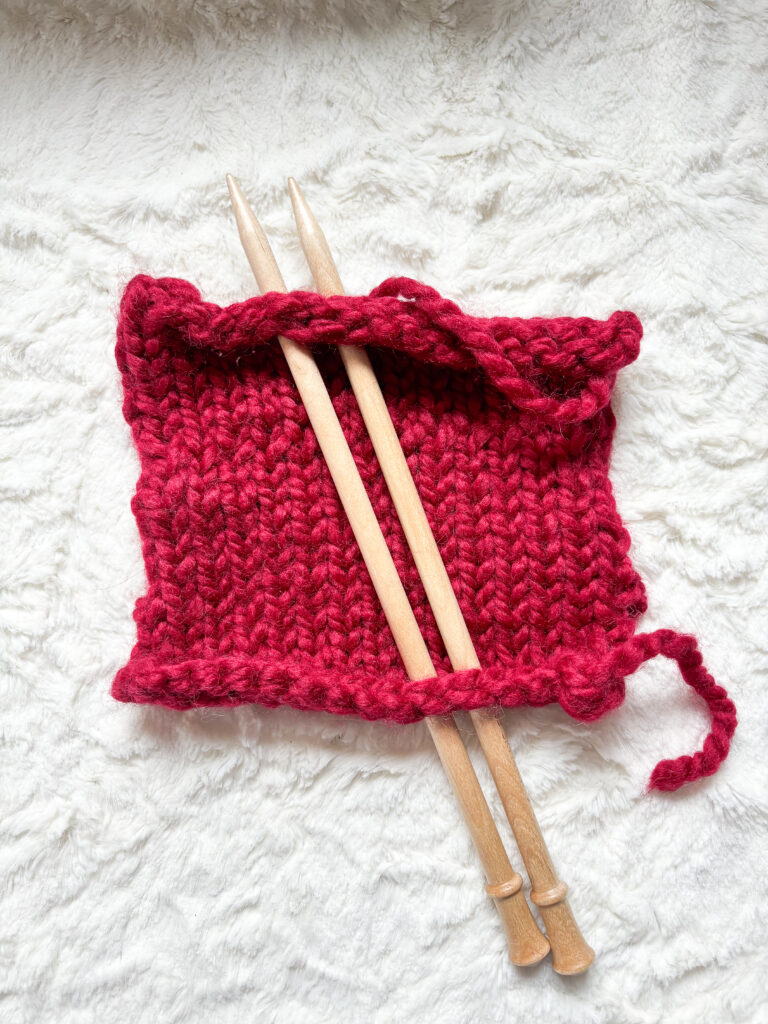
The majority of patterns list gauge in stockinette stitch, like my knit swatch, pictured here.
After knitting the swatch, you count how many stitches and rows fit into that 4-inch square. If your gauge matches the pattern, great! If not, you may need to adjust your needle size and/or tension to achieve the correct gauge.
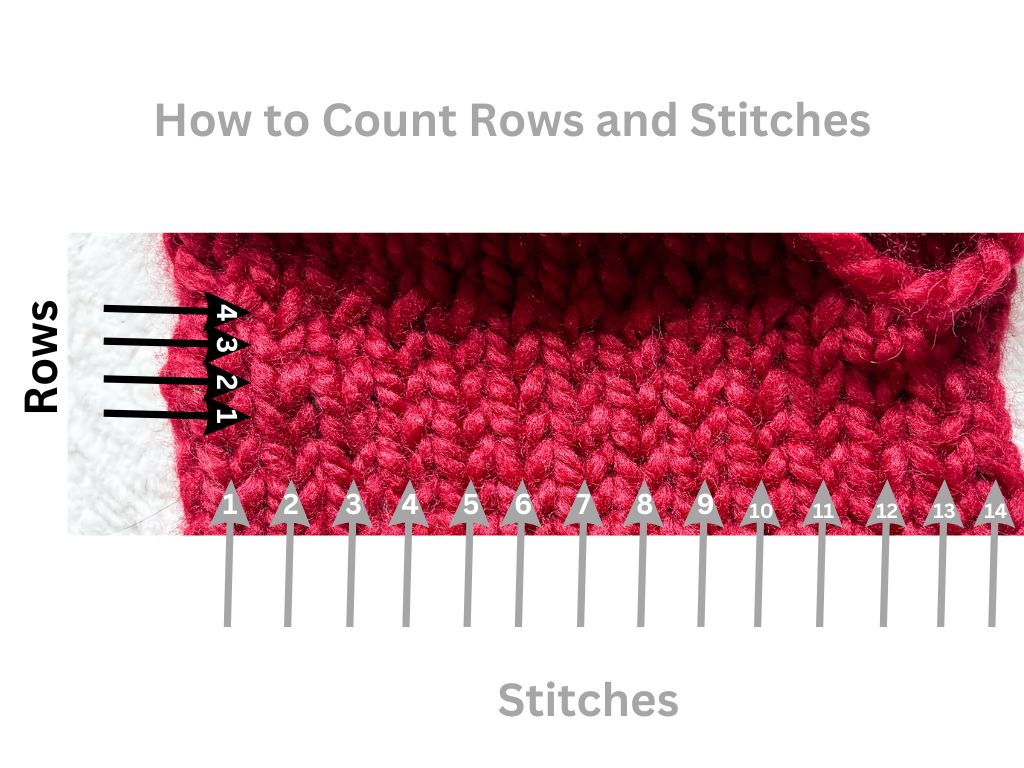
Counting Rows and Stitches
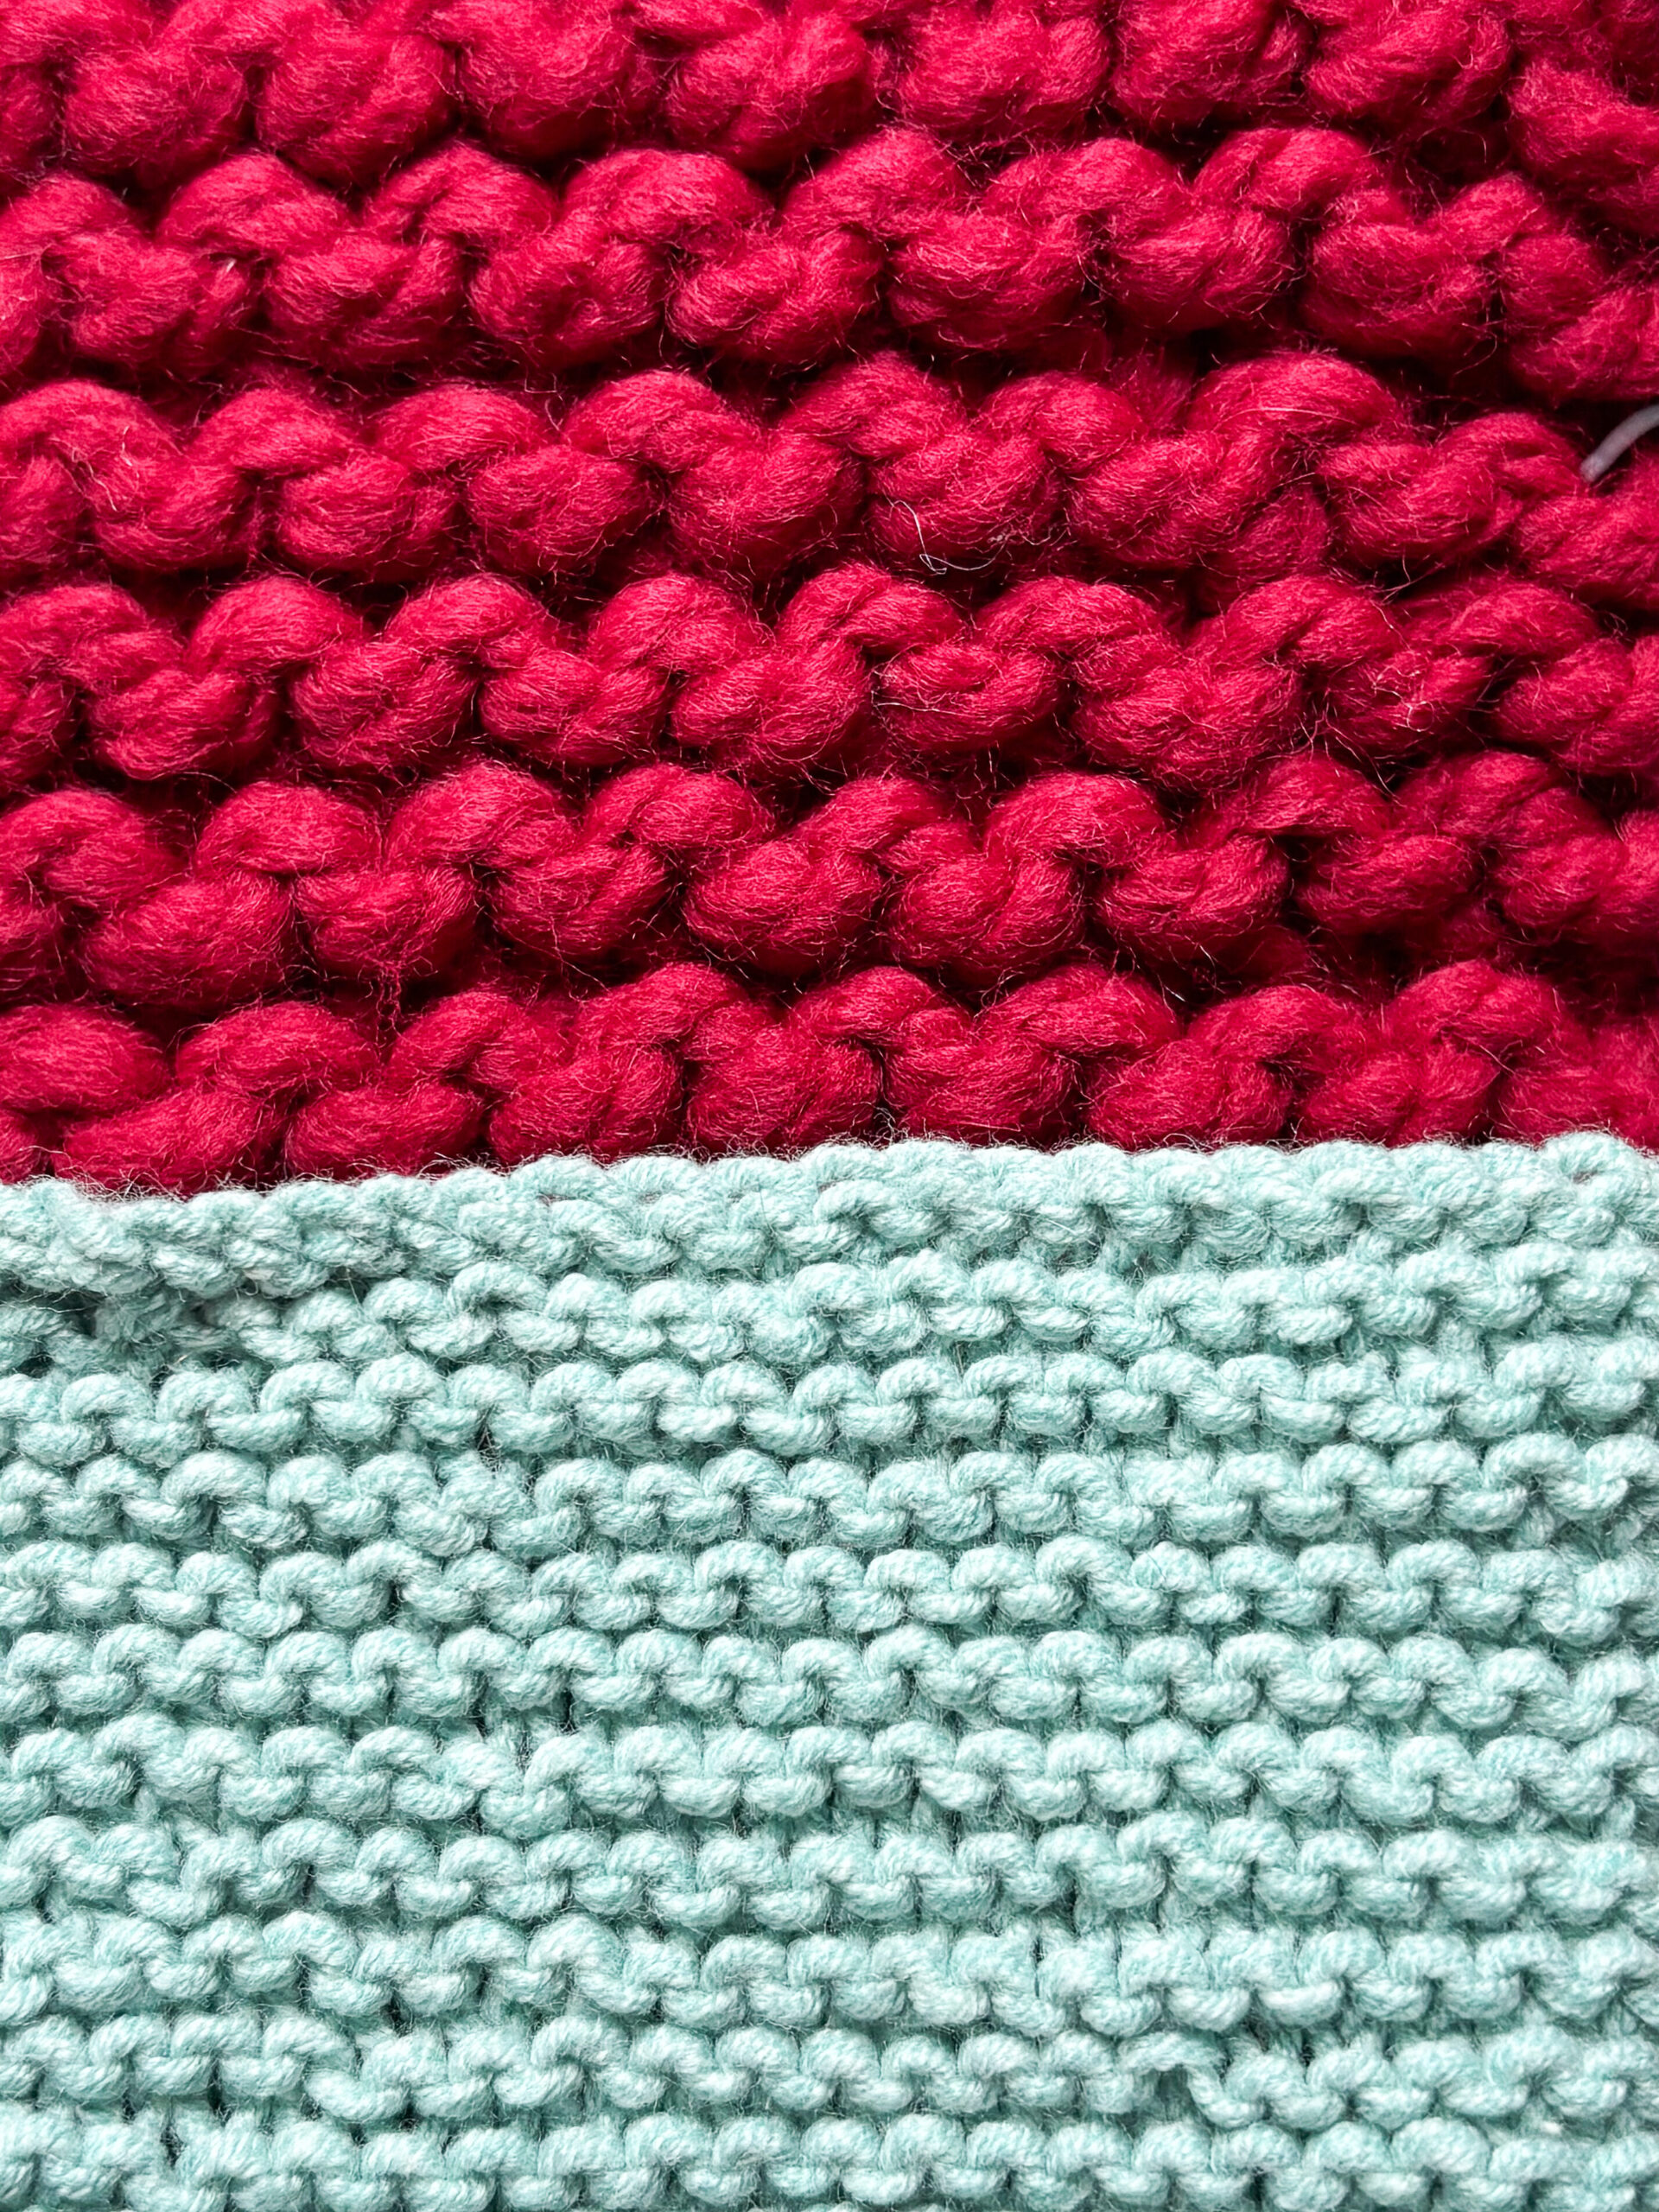
Counting stitches sounds simple, right? Well it can actually be a bit tricky. Both myself and students I’ve taught to knit have miscounted stitches in our gauge swatch. I’ve included an illustration below as an example. This is not the whole height of the swatch as stockinette tends to curl and wouldn’t work for this illustration. When you’re counting, be sure to hold your swatch flat and count all rows. I find it easiest to count the “V”s when counting stockinette stich. In the swatch below, I counted the “V”s with the point to the bottom.
How do I adjust my gauge?
To know how to adjust your gauge, it’s important to understand the what influences gauge and how. Several factors influence gauge beyond the tension person knitting. Needle size, yarn and stitch all influence gauge.
The larger the needles the fewer stitches you’ll create per inch.

Likewise, the thicker the yarn weight the the fewer stitches you’ll create per inch.
Of course, the smaller the needles the more stitches you’ll need to create an inch of knitting; the thinner the yarn the more stitches you’ll need to knit an inch. We’ll talk about how different stitches influence gauge later in this post.
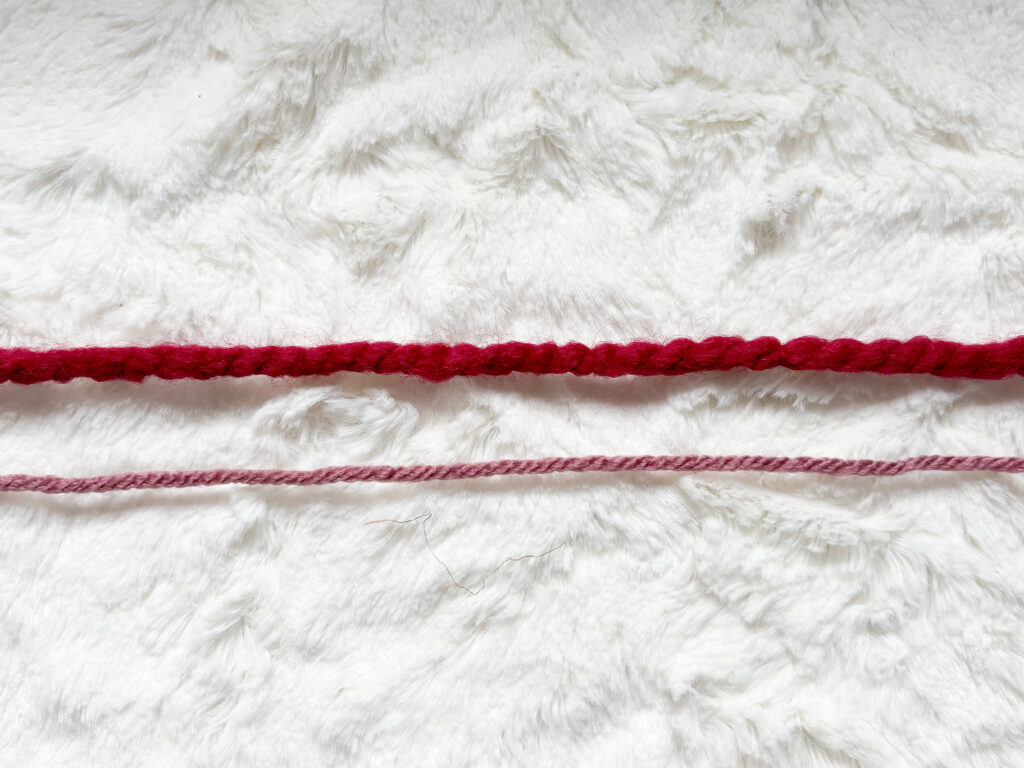
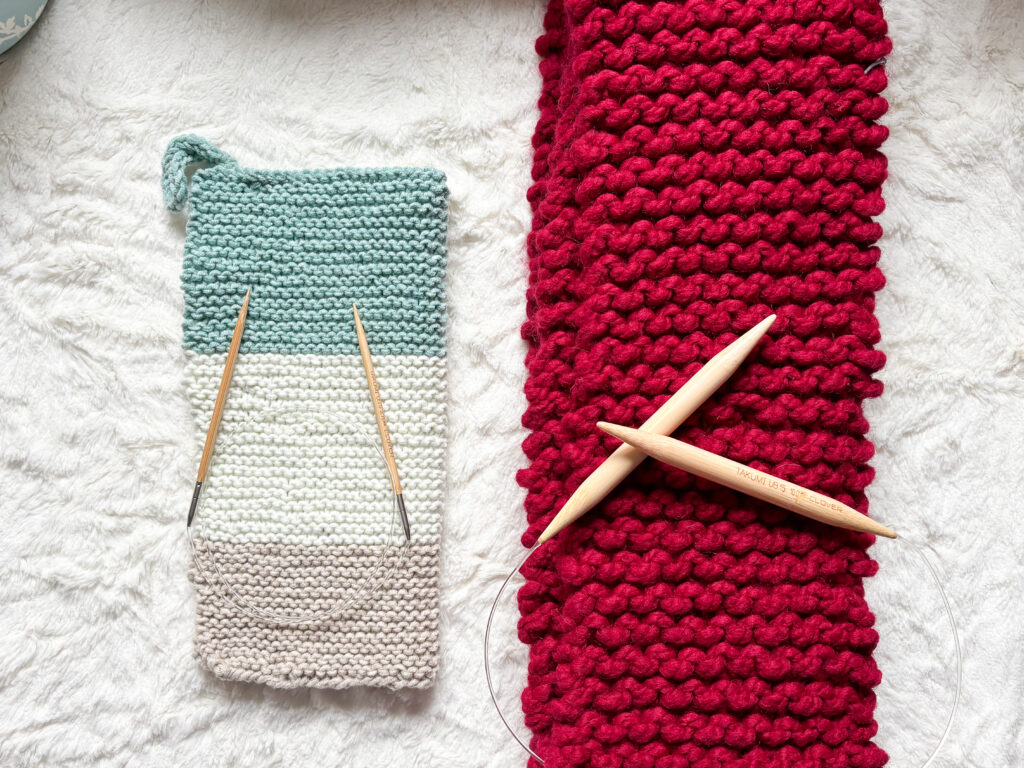
The knit pieces in these pictures are both in the same stitch. The red using super bulky yarn on 10.0mm needles, while the teal was created using worsted weight yarn on size 3.75mm stitches.
How to Achieve Gauge
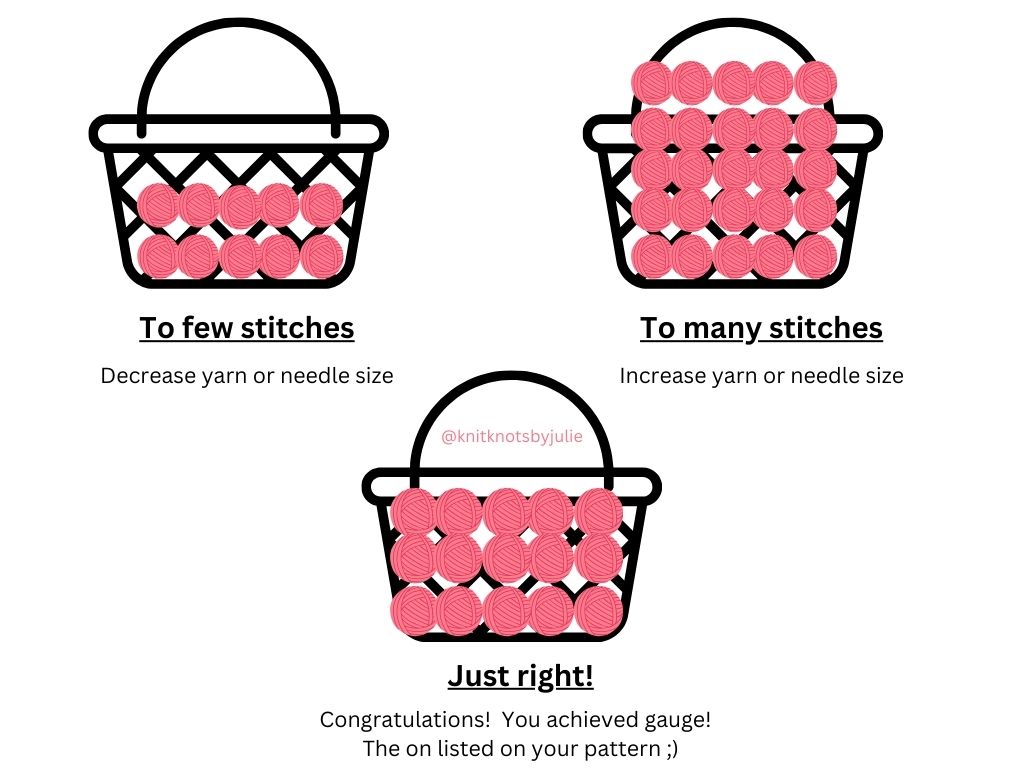
Let’s look at our illustration. The baskets represent the measurement specified by your pattern. The balls of yarn represent the stitches created by using the suggested yarn weight and needle size. The first basket does not have enough balls of yarn to fill it up. You need to create more stitches to fill the basket. Remembering the smaller needles and smaller each create more stitches per inch, you will need to adjust one of these.
The second basket has so many balls of yarn it’s over flowing. You need to create less stitches to fill the basket appropriately. Remembering larger needles and thicker yarn weight create less stitches per inch you will need to adjust one of these.
Should I adjust my needle size or my yarn weight? This really depends on the supplies you have on hand. If you have a certain yarn you want to use for your project, you’ll need to adjust your needle size. Conversely, if you have limited needle sizes but a nice yarn stash, you’ll want to adjust your yarn size.
When do I need to knit a gauge swatch?
Ideally, with every project. For most of us, that isn’t realistic though. The red gauge swatch pictured above. That was my very first gauge swatch. I thought I needed to keep it to refer back to. (If you’re laughing, that’s fine. I look back and chuckle too.) Now when I make a gauge swatch I write down the gauge along with the yarn and needle size I used, rip the stitches out, and move on with my project.
If you don’t want knit a new gauge swatch every time, here are a few key times it’s critical to knit a new gauge swatch? Every time you’re using a new type of yarn, even if it’s the same weight, if it’s a different line or brand than what you typically use, knit a new swatch. If you’re using different needles, knit a new swatch.
Different stitches are different sizes. For example 1×1 rib has fewer stitches in an inch than stockinette stich knit with the same needles and yarn. Every time the pattern states to knit your gauge swatch in a stich you don’t already have a gauge swatch in knit a new swatch.
If ANY of these above qualifiers apply to your new project knit a new swatch. It really doesn’t take that long and it will save you lots of headaches at the end of your project. I promise! I had a hat that came down to my chin when I used the wrong needle size! Clearly, I didn’t make a gauge swatch, and have a hat that is too big for anyone!
Gauge is like the blueprint for your knitting project
In summary, knitting gauge is like the blueprint for your knitting project. It ensures that your finished piece turns out the right size and shape according to the pattern you’re following. So once you have achieved gauge you’re ready to start your project!
Now that you’re ready to start a new project…. Blankets are a wonderful gift, or way to cozy up any space in your own home. Check out my beginner friendly blanket pattern here. If you can knit and purl you can easily make this blanket. Easy Beginner Blanket Knitting Pattern: Mountain View Throw
BASIC
INVITE
30% off
your order
at
SimplySeeking30
Use Code:


